Why Roof Leaks Often Start Around Patios and Additions
Learn why leaks often start where patios and additions attach, the warning signs to watch for, and when to call a roofer before small stains become big repairs.
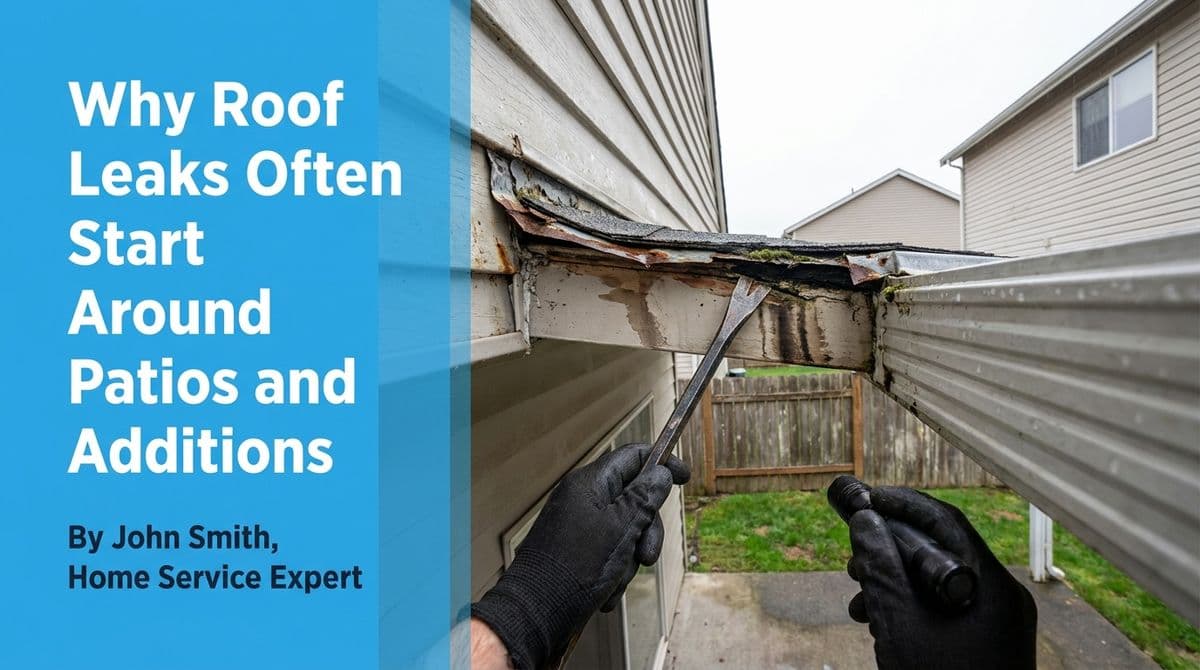
Why We Get So Many Calls About Leaks Near Patios and Additions
We recently got a call from a customer — let’s call her Jessica — who had just noticed a small swollen spot on her ceiling. As we talked, she mentioned there was an older stain nearby that “never really went away,” and then casually added, “Oh, and we have this attached patio cover in the back that’s kind of coming down… the wood looks like it’s pulling away from the house.”
Right away, that caught our attention. When we hear “attached patio cover,” “room addition,” or “porch roof,” our leak radar goes off. Those connection points between the main house and an add-on are some of the most common sources of interior ceiling leaks.
In Jessica’s case, she could see problems mostly inside — swelling and staining near a doorway — and some suspicious wood separation outside at the patio. That’s a classic combo when the connection and flashing between the house roof and a patio or addition isn’t done correctly.
How Patios, Porches, and Additions Tie Into Your Main Roof
Any time someone attaches a structure to your home — a covered patio, a porch roof, a sunroom, or a room addition — that new roof has to tie into the existing house in a watertight way. That usually means:
- The new roof surface overlaps or tucks under the existing shingles or roofing.
- Metal flashing (or similar materials) bridges the joint between old and new surfaces.
- Seals and underlayment are installed under that flashing to back it up.
Done right, that connection sheds water smoothly from the house roof onto the patio or addition roof and off the edge. Done wrong, it can act like a funnel, guiding water straight into your walls and ceilings.
The Most Common Mistakes We See at These Connections
With Jessica’s home, we suspected what we see over and over again when we inspect attached patio or addition roofs:
- Missing or improper flashing: Sometimes the builder just caulks the joint where the patio cover meets the siding or stucco, or relies on a narrow, flat piece of metal that doesn’t properly turn up the wall. Without proper step or counter-flashing, water works its way behind the siding and into the framing.
- Poor transitions in roof slope or materials: Where two slopes meet or where shingles run into metal or a flat roof, water tends to slow down and pool. If that transition isn’t carefully detailed, leaks follow.
- Over-reliance on caulk: Caulk is a backup, not a primary waterproofing system. Sun, heat, and movement cause it to crack, and once it fails, there’s often nothing solid underneath to stop water.
- Patio cover movement or sagging: When a patio starts to “come down” or sag, like Jessica described, it pulls away from the house. That opens gaps where the roof used to be tight, breaking the seal and stressing the flashing.
The scary part? The water doesn’t always show up right at the connection. It can travel along rafters, beams, or drywall and pop out in a totally different area — often as a ceiling stain by a door or in the middle of a room.
Early Interior Signs: What to Look for on Your Ceilings and Walls
Jessica first noticed a small swollen spot on her ceiling and an old stain nearby that seemed to be “leaking still.” Those are textbook early warning signs. Indoors, keep an eye out for:
- Brown or yellowish stains on ceilings or upper walls, especially near exterior doors or where a patio or porch attaches.
- Swelling or bubbling drywall that looks puffy or soft to the touch.
- Hairline cracks or sagging sections of ceiling around the stains.
- Peeling paint or blistering texture in a localized area.
Even if the spot seems small or “old,” that doesn’t always mean the leak is old. Sometimes a slow, intermittent leak only shows itself after heavy rain, and the ceiling takes a while to reveal the new moisture.
Exterior Red Flags Around Patios and Additions
While Jessica didn’t yet see water at the patio itself, she did see the structure pulling away — and that’s just as important as the interior signs. Outside, walk around your attached structures and look for:
- Sagging patio covers or porch roofs that don’t look level anymore.
- Wood separating from the house — beams or fascia that have a visible gap where they used to be tight.
- Gaps in trim or siding where the patio or addition meets the wall.
- Cracked or missing caulk at the top of the patio roof or along the connection line.
- Rusty, bent, or missing metal flashing where the new roof meets the old.
None of these issues fix themselves. Once movement starts and gaps open up, every rain gives water one more chance to find its way inside.
The Risks of Ignoring These Leaks
It’s tempting to ignore a small stain or a little sagging on the patio cover, especially if you don’t see water actively dripping. But here’s what we often find when we open things up after a “minor” leak has been going on:
- Rotten roof decking and framing around the connection.
- Mold or mildew inside the ceiling or wall cavities.
- Compromised patio structures that are unsafe to sit under.
- Spread of damage as water follows framing and wiring runs.
The repair bill is almost always smaller when we catch these issues early — often a flashing repair and some localized roof work instead of major structural and interior restoration.
When to Call a Roofer — and What Photos Help Most
When Jessica called, we asked her to send photos of both the inside leak and the back patio. That helps us plan the inspection and get a sense of how serious the issue might be. If you’re in a similar situation, here’s what we recommend:
- Inside photos:
- Take a clear photo of the stain or swollen area straight on.
- Step back and take a wider shot that shows the stain in relation to doors, windows, or corners of the room.
- Outside photos:
- Get a wide shot of the entire patio, porch, or addition where it meets the house.
- Take close-ups of any separated wood, gaps, sagging, or loose flashing.
- If safe, take a photo of the roof surface above that area from ground level.
You don’t need to climb on the roof — your safety comes first. Good ground-level photos are enough for us to know where to focus when we arrive.
Why an Attic Check Can Be So Helpful
On many inspections, we can confirm the leak from the roof side alone. But, like we explained to Jessica, sometimes it’s very helpful to also take a look in the attic:
- We can trace water stains along rafters and decking to pinpoint the source.
- We can see the full extent of moisture and any hidden rot or mold that hasn’t shown on your ceiling yet.
- We can confirm if multiple leaks are connected to the same problem area or if there are separate issues.
If you’re comfortable and it’s safe, you can sometimes spot dark, discolored decking or damp insulation in the attic above a stained ceiling. But if you’re unsure, it’s perfectly fine to leave that part to us.
If You See These Signs, Don’t Wait
If you have an attached patio, porch roof, or room addition and you’re seeing ceiling stains, swelling drywall, or visible gaps where the structure meets your house, it’s time to schedule a roof inspection. The connection and flashing details at those junctions are critical, and small issues can turn into big repairs if they’re ignored.
We’re always happy to come out, take a thorough look at both the roof and the connection points, check the attic if needed, and give you clear, straightforward options to get things watertight again — before that little stain becomes a major headache.